Ready to get started with your SolaraGem? Please follow each step below carefully. It will save you time and frustration.
In order to operate the SolaraGem, you need the Lume Cube 2.0 light and some sort of stand or tripod. If you aren't sure you have everything, visit the Step by Step page to double check.
We will start by assembling all the pieces, and then move into how to use the SolaraGem.
Lume Cube 2.0 Light Source
See the image below which shows Lume Cube 2.0 light source. (Please note that the newest version of the Lume Cube 2.0 doesn't include any accessories except for the charge cable. We supply the frame.)
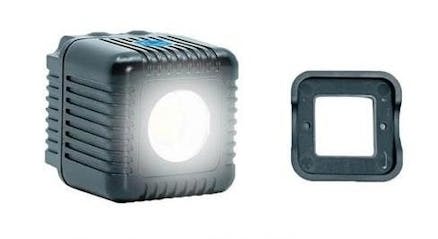
The magnetic frame fits on the light, and is used to hold the SolaraGem in place so that the light passes through the SolaraGem. The SolaraGem has magnets that hold it in place securely, yet make it easy to add and remove from the Lume Cube 2.0.
Below are pictures of the Lume Cube 2.0 with the magnetic frame attached to it. Note that nothing is placed between the light and the SolaraGem.

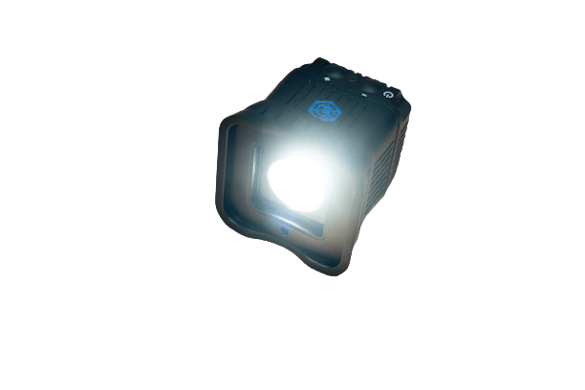

Above is a picture of the SolaraGem as it sits on the Lume Cube 2.0. It should fit easily and snugly, so if it doesn't, then something isn't right. Be sure that you have removed everything from the frame per the above. (CLICK HERE to bring up the initial set up video)
Note that attaching the magnetic frame to the Lume Cube 2.0 can be challenging at first. It fits very tightly, and almost everyone has trouble doing it. See the video below for the best way to do it:
There are four key sides of the Lume Cube 2.0. They are shown in the picture below:
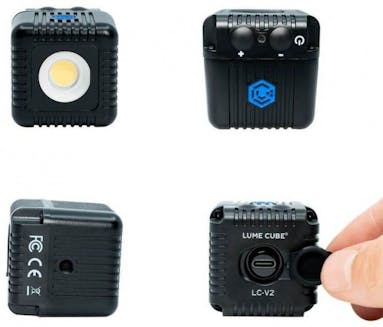
Front
Back
Bottom
Top
The Front is where the light comes out. The Top has the On/Off controls and indicator lights. The Bottom has a threaded hole for attaching a tripod or stand. The Back is where you connect the charge cable, which is a standard USB-C type (included with the light).
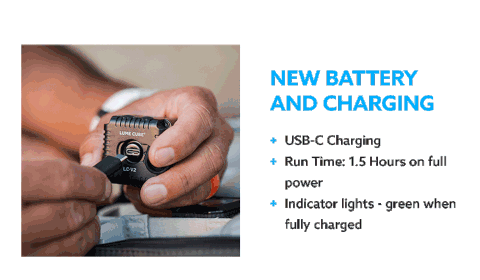
This image shows the charge cable being plugged into the light.
The indicator light will blink red while charging, and turn green when fully charged.

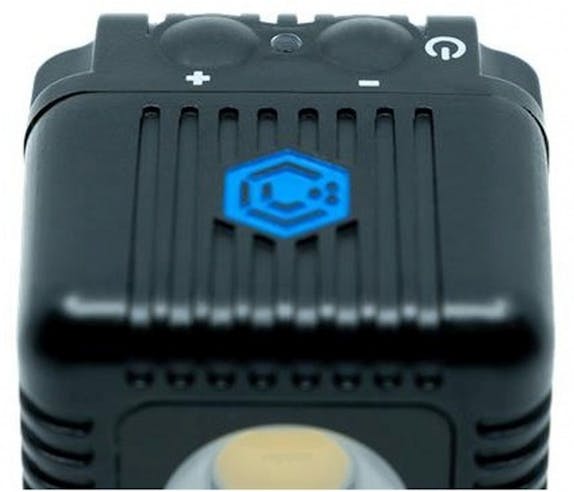
The light controls are shown below. To turn on the light, hold down the button behind the minus (-) symbol, next to the power symbol until the light comes on. The plus (+) button is used to increase the light intensity, although we recommend leaving it at the initial level of 10%. Hold the (-) button down to turn the light off.
The indicator light between the buttons is used to indicate the charge status and Bluetooth connection status. When charging, that light will slowly blink red, turning to green when fully charged. Blue indicates the light is connected to the phone app, which is discussed below.
Run through the above steps a few times until you are comfortable and familiar with the basics of the Lume Cube 2.0.
The next step is to set up the free app that allows you to choose the strobe options for the Lume Cube 2.0. That is detailed at the Lume Cube Operation link.
Once you have set up the app and are familiar with how to choose the settings, it's time to start using the SolaraGem!